Receiving an Item
In the order details portion of the Receiving Orders page, you are able to receive any line item in the order while you are adding an order or editing an order.
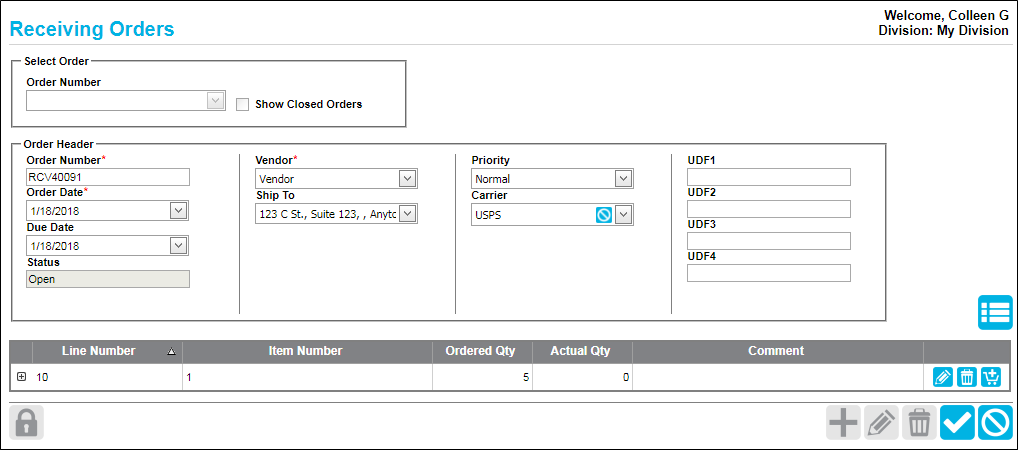
When an order is in Add mode or Edit mode, the line item will contain three icons:
-
 Edit
Edit
-
 Delete
-
 Receive
How to Receive an Item
- To receive an item, click the Receive icon from the order line.
- The Receive Inventory form appears. The information for the selected line item is found in the form.

- If your system uses containers, the Location field will contain a container control, which supports item receipt to an existing container or a new container; for more information about using the container control, see "Container Control".
- The form displays the line item information in the fields contained in the top row; this information cannot be changed at the Receive Inventory form:
- Line Number: displays the line number from the order line; automatically filled in by the system, cannot be changed at this form.
- Item Number: displays the item number from the order line; automatically filled in by the system; cannot be changed at this form.
- Description: displays the item description, if one is entered for this item at the item's record; automatically filled in by the system; cannot be changed at this form.
- Ordered Qty: displays the ordered quantity as entered in the item line; automatically filled in by the system; cannot be changed at this form.
Receiving the Item to a Location
An item in the receiving order is received to a location via the Location field in the Receive Inventory form. The site, location, and item details that encompass the item receipt are entered at the Receive Inventory form.
- Site: the default site of the logged-in user is automatically entered in this field. If the logged-in user has access to more than one site, the Site drop-down list will contain them.
- Location: click the drop-down arrow in the Location field and select the site-location to which the item is being received.
- Container Control: If your system uses containers, you are able to receive the item to a physical location, an existing container, or a new container via the container control found in the Location field. For more information about using the container control, see "Container Control".
- Unit of Measure: If you system uses multiple units of measure, select a unit of measure for this item from the drop-down list.
- Quantity: Enter the receive quantity in this field. (If the item is serialized the receive quantity must be 1.)
- Serial Number: If this item is serialized, a serial number is required and must be entered in this field.
- Lot: If this is a lot item, a lot is required and must be entered in this field.
- Expiration Date: If this item requires an expiration date, an expiration date is required and must be entered in this field.
- Unit Cost: If this item is a Track Cost item, the unit cost is required and must be entered in this field.
- RFID Tag Number (available when the default division uses RFID): If this item uses RFID and has an RFID tag number, the RFID tag number is placed in this field. When an RFID tag number is entered, the receipt quantity cannot be greater than one (1).
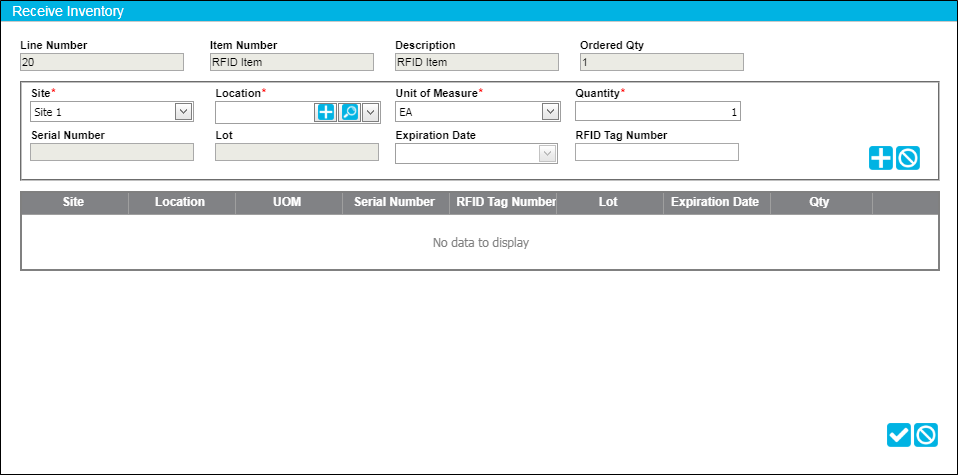
- Add icon: To add this item to the order for receipt, click the Add icon to place it in the grid portion of the form.
- Cancel icon: If you do not want to add this item for receipt, click the Cancel icon to place it in the grid portion of the form.

- If this item has been partially received, repeat the steps above to receive additional quantity.
- The additional quantity appears in the grid.

- Once a item is selected for receipt and placed in the grid portion of the Receive Inventory form, you may remove it from the form, if necessary. To do so, click the Delete icon in the item receipt line. A prompt appears asking you to confirm the delete action. Click Ok to close the prompt and remove the item receipt line from the grid. (If you click Cancel, the prompt closes and the item remains in the grid.)
- When you are finished receiving this item, click the Save icon in the bottom right portion of the Receive Inventory form to close the form and load this item receive quantity into the Receiving Order.
- You are returned to the Receiving Orders page; the receive quantity has been entered into the Actual Quantity field for this line item in the Details portion of the form.

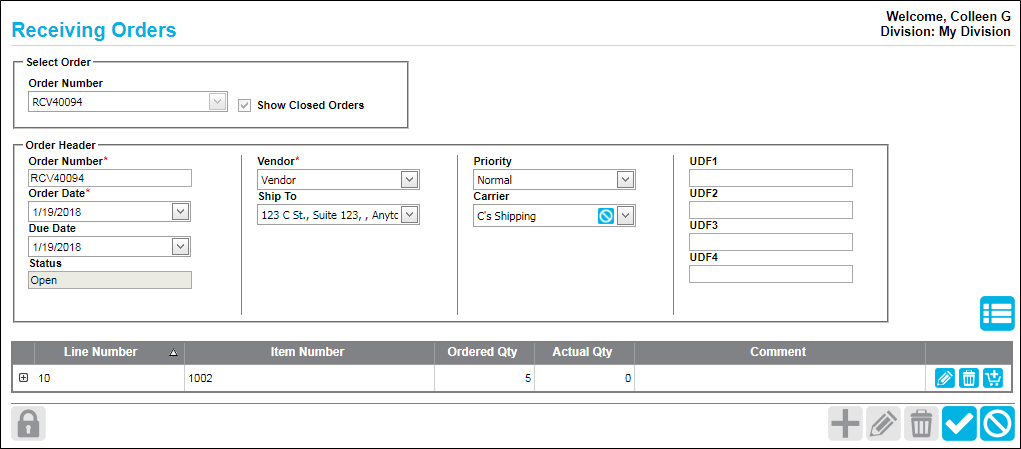
Processing the Receiving Order
The Receiving Order is processed from the Receiving Orders page. Any item entered in the Details portion as the Actual Qty is added to inventory upon order save.
- To save this order and perform the item receipt, click the Save icon in the bottom right portion of the Receiving Orders page.

- The Receiving Orders page clears and the order is saved. When this order is saved, the receive quantity (entered in the order line as the Actual Qty) for any item in the order is received into the system and added to inventory.
- If all items in the order are received, the order is automatically marked as closed.